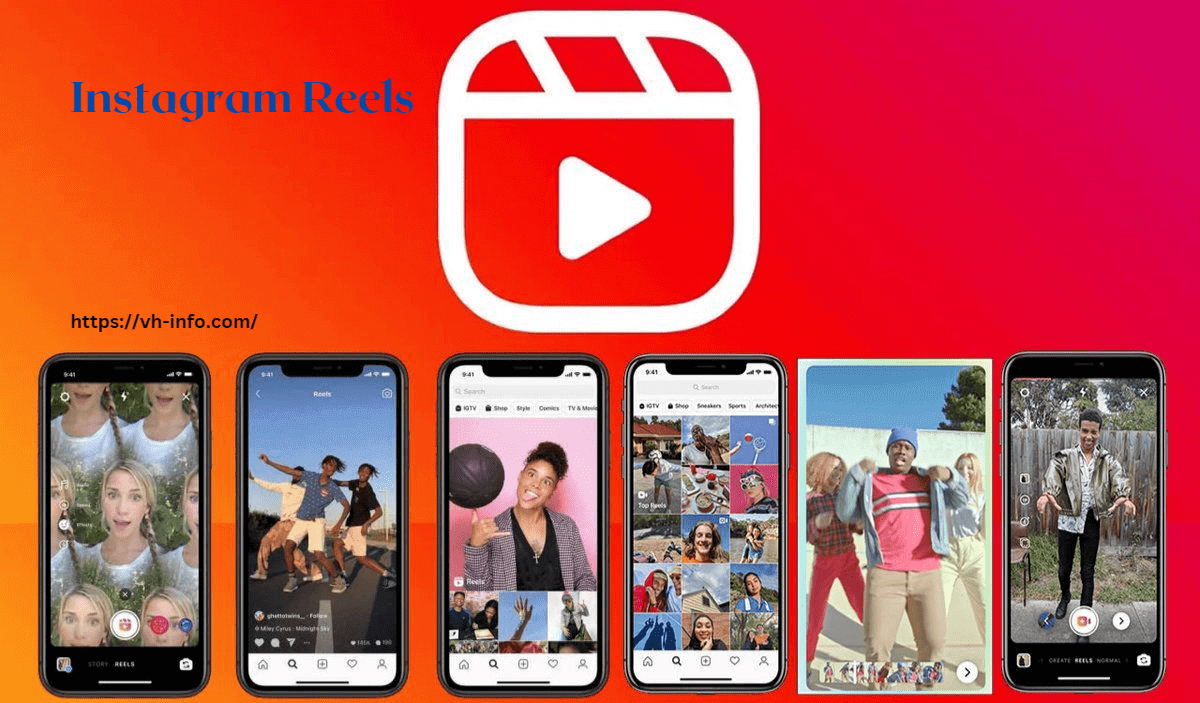
Instagram Reels have become a popular way to create short-form video content on the platform. While many users create Reels using videos, it’s also possible to create Reels using photos. In this blog post, we’ll explore how to make Reels on Instagram using photos.
We’ll cover topics such as planning your Reel, using Instagram’s editing tools, adding music and audio, creating a timelapse Reel, using text and captions, collaborating with other users, creating a branded Reel, sharing your Reel on Instagram, and measuring its success.
Whether you’re a business or a personal user, creating Reels with photos can be a fun and creative way to engage with your audience on Instagram.
Introduction to Instagram Reels: A Beginner’s Guide

Instagram Reels are a feature on the social media platform that allows users to create and share short-form videos.
Reels are similar to TikTok videos, with a maximum length of 60 seconds, and can be created using a variety of editing tools and features.
For beginners, creating Reels on Instagram can seem daunting, but it’s an excellent way to engage with your followers and grow your audience. Reels can be created using a variety of media, including videos, photos, and audio.
The editing tools in Instagram allow users to add text, stickers, music, and effects to their Reels, making them highly customizable.
Reels can be shared on your Instagram feed, your Instagram Stories, or in the Reels tab, making them highly visible to users across the platform. Additionally, Instagram’s algorithm prioritizes Reels, making them an excellent way to boost your visibility and reach new followers.
In this beginner’s guide to Instagram Reels, we’ll explore the basics of creating Reels using photos, videos, and audio, and provide tips and tricks for optimizing your Reels for maximum engagement and growth.
Planning Your Reel: Tips and Tricks

Planning your Instagram Reel is an essential step in creating a successful and engaging video. Before you begin, it’s important to consider the theme of your Reel and the message you want to convey. Here are some tips and tricks for planning your Reel:
- Choose a theme: Consider the message or story you want to tell with your Reel. A theme will help guide the selection of your photos and the overall aesthetic of your video.
- Select your photos: Choose high-quality photos that align with your theme and if any appear unclear, use an unblur image tool to restore their sharpness before uploading. You can edit your photos within Instagram or use an external editing app to enhance their quality. You can edit your photos within Instagram or use an external editing app to enhance their quality, including changing your image backdrop.
- Create a storyboard: A storyboard is a visual representation of your Reel, which outlines the sequence of photos and any text or effects you plan to add. A storyboard can help you visualize the final product and ensure that your Reel flows seamlessly.
- Think about timing: Consider the duration of each photo and the overall length of your Reel. The ideal Reel length is between 15-30 seconds, so be selective with the photos you include.
By planning your Reel in advance, you can ensure that your video is engaging, on-message, and visually appealing.
Using Instagram’s Editing Tools for Your Reel

Instagram’s editing tools provide users with a range of features to enhance their Reels. Here are some tips for using Instagram’s editing tools to create a captivating Reel:
- Edit your photos: Instagram’s editing tools allow you to crop, adjust brightness and contrast, and add filters to your photos. Experiment with different edits to find the perfect look for your Reel.
- Add music and audio: Music and audio are essential elements in Reels. Instagram provides a library of songs and audio to choose from or you can upload your own audio. Make sure the audio you choose aligns with the theme of your Reel.
- Use text and stickers: Text and stickers are a great way to add context and humor to your Reel. Use Instagram’s built-in text and sticker tools or create your own using external editing apps.
- Adjust photo duration: Instagram’s editing tools allow you to adjust the duration of each photo in your Reel. Consider the rhythm of your Reel and adjust photo duration accordingly.
By using Instagram’s editing tools, you can elevate your Reels to the next level, making them more engaging and visually appealing. Experiment with different features to find the right combination for your Reel.
Adding Music and Audio to Your Reel

Adding music and audio to your Instagram Reel is a great way to enhance the overall mood and tone of your video. Here are some tips for selecting and adding music and audio to your Reel:
- Choose the right music: Instagram’s music library offers a wide range of songs to choose from. Consider the theme and mood of your Reel and choose a song that complements it.
- 2. Add original audio: Consider adding your own original audio to your Reel. This could be a voiceover or sound effects that you record separately and add to your Reel.
- Adjust the volume: Instagram’s editing tools allow you to adjust the volume of your music and audio. Make sure the volume levels are balanced, so your audience can hear both the music and your voice clearly.
- Use transitions: Use transitions between clips to create a seamless and cohesive Reel. Use music to guide the transitions between clips and enhance the overall flow of your video.
Adding music and audio to your Reel can create an emotional connection with your audience and make your video more memorable. Experiment with different songs and sounds to find the right fit for your Reel.
NFS Mean on Instagram (What it Means & How to Use It!)
NFS on Instagram, NFS meaning stands for “Not For Sale” and it’s commonly used by artists, photographers, and creatives to indicate that their work is not available for purchase. Let’s discuss what does NFS mean on Instagram actually??
NFS can be used as a hashtag or caption on Instagram to clarify that a post is not a promotion or advertisement for selling goods or services. This is especially important for creatives who want to share their work with others, but not necessarily monetize it. NFS can also indicate that the artist is not interested in selling a particular piece or that it’s part of a personal collection. Overall, NFS is a useful tool for creatives to protect their work and clarify their intentions on Instagram.
Creating a Timelapse Reel Using Photos
Creating a timelapse Reel using photos is a creative and engaging way to showcase a process, event, or transformation. Here are some tips for creating a timelapse Reel using photos:
- Select your photos: Choose a series of photos that show a clear progression over time. This could be anything from a sunset to a painting process.
- Set your timeline: Decide on the overall length of your Reel and the duration of each photo. The ideal length for a Reel is between 15-30 seconds.
- Use a photo editing app: Use a photo editing app to crop and adjust the photos to ensure that they align perfectly with each other.
- Add music: Add music to your Reel that complements the mood and tone of your photos. Choose music that builds up as the timelapse progresses.
- Add text: Consider adding text to your Reel to provide context and information about what is being shown in the photos.
By creating a timelapse Reel using photos, you can create a mesmerizing and captivating video that showcases a transformation over time. With the right editing tools and music, you can create a truly memorable Reel.
Using Text and Captions in Your Reel
Text and captions are important elements in Instagram Reels, as they can provide context, and information, and add an extra layer of creativity to your video. Here are some tips for using text and captions in your Reel:
- Keep it short and sweet: Instagram Reels are short-form videos, so keep your text and captions short and to the point. The ideal length is one or two lines.
- Use a consistent font: Consistency is key when it comes to text and captions. Choose a font that aligns with the aesthetic of your Reel and use it consistently throughout.
- Use text to highlight key points: Use text to emphasize important moments or key points in your Reel. This will help to guide the viewer’s attention and enhance the overall narrative of your video.
- Add subtitles: Consider adding subtitles to your Reel, especially if you have audio in a different language. This will make your video accessible to a wider audience.
By using text and captions in your Reel, you can add an extra layer of creativity and information to your video. Keep it short, and consistent, and use it to highlight key points to create a truly engaging and informative Reel.
Collaborating on a Reel with Other Instagram Users

Collaborating on a Reel with other Instagram users is a great way to create content that is both creative and engaging. Here are some tips for collaborating on a Reel with other Instagram users:
- Choose a partner with complementary content: Choose a partner who has a similar aesthetic and style to you, but also brings something different to the table. This will create a well-rounded and interesting Reel.
- Decide on a theme: Decide on a theme or concept for your Reel together. This will help to ensure that your content is cohesive and tells a clear story.
- 3. Plan out your shots: Plan out your shots in advance to ensure that you capture everything you need for your Reel.
- Communicate effectively: Communication is key when collaborating with others. Make sure that you are both on the same page and that you are communicating effectively throughout the process.
- Share the workload: Divide the workload evenly between both partners, and make sure that you are both contributing equally.
By collaborating on a Reel with other Instagram users, you can create a truly unique and engaging video that showcases your creativity and collaboration skills. With the right planning and communication, you can create a successful Reel that will captivate your audience.
Tips for Creating a Branded Reel
Creating a branded Reel is a great way to promote your brand or business on Instagram. Here are some tips for creating a successful branded Reel:
Keep it on-brand: Make sure that your Reel aligns with your brand’s aesthetic and messaging. Use your brand’s colors, unique fonts, and tone to create a consistent and cohesive video.
Use your brand’s products or services: Showcase your brand’s products or services in your Reel. This will help to promote your business and create brand awareness.
Include a call-to-action: Include a call-to-action in your Reel to encourage viewers to take action, such as visiting your website or following your Instagram account.
Use hashtags: Use relevant hashtags in your Reel to help it reach a wider audience and increase its visibility.
Be creative: Don’t be afraid to get creative with your Reel. Use humor, animation, or other creative elements to make your Reel stand out.
By creating a branded Reel, you can promote your business or brand in a creative and engaging way. With the right planning and execution, you can create a Reel that captures your audience’s attention and promotes your business or brand effectively.
Sharing Your Reel on Instagram

Once you have created your Reel, it’s time to share it with your Instagram audience. Here are some tips for sharing your Reel on Instagram:
- Add a caption: Write a caption that is engaging and includes relevant hashtags to help your Reel reach a wider audience.
- Share to your feed and story: Share your Reel to your Instagram feed and story to maximize its visibility.
- Tag relevant accounts: If your Reel features other Instagram users or brands, tag them in your post. This will help to increase engagement and visibility.
- Promote on other platforms: Share your Reel on other social media platforms or your website to reach a wider audience.
- Engage with your audience: Respond to comments and messages from your audience to encourage engagement and build relationships with your followers.
By sharing your Reel on Instagram, you can reach a wider audience and increase engagement with your followers. With the right promotion and engagement, your Reel can help to promote your brand or business and build your online presence.
Conclusion: Making Reels with Photos on Instagram
In conclusion, creating Reels with photos on Instagram is a great way to engage with your audience and promote your brand or business. By following the tips and tricks outlined in this blog series, you can create engaging and creative Reels that will capture your audience’s attention.
When planning your Reel, it’s important to choose a theme and plan out your shots in advance. Use Instagram’s editing tools to enhance your photos and create a well-rounded Reel. Adding music and audio can also make your Reel more engaging and memorable.
Collaborating with other Instagram users can help you create unique and creative Reels while creating a branded Reel can help promote your business or brand effectively.
Once your Reel is complete, it’s important to share it with your Instagram audience and engage with your followers to encourage growth and build relationships.
By implementing these tips and tricks, you can create Reels that stand out on Instagram and help you achieve your goals on the platform.
Author Bio
Kashish Mehta is a Digital Marketing Expert and an Outreach Specialist. She loves to talk about SEO, content marketing & digital marketing strategies. In her free time, she likes to read & stay updated on the latest digital marketing trends!
You can always reach out to kashish on LinkedIn


